微信小程序电商实战-你所困扰的自定义顶部导航栏都在这里
发布时间:2020-09-30
本文章是一个系列文章,以一个完整的可用于生产的实际项目探索微信小程序开发中我们经常会遇到的问题,希望能提供完美的解决方案,这次是本系列文章的第二篇了,一下列出该系列文章链接。
微信小程序及h5,基于taro,zoro最佳实践探索
微信小程序电商实战-解决你的登陆难问题
微信自6.6.0版本之后提供了自定义底部导航栏的功能,这使得我们的全屏页面设计成为了可能
首先演示下最终的实现效果
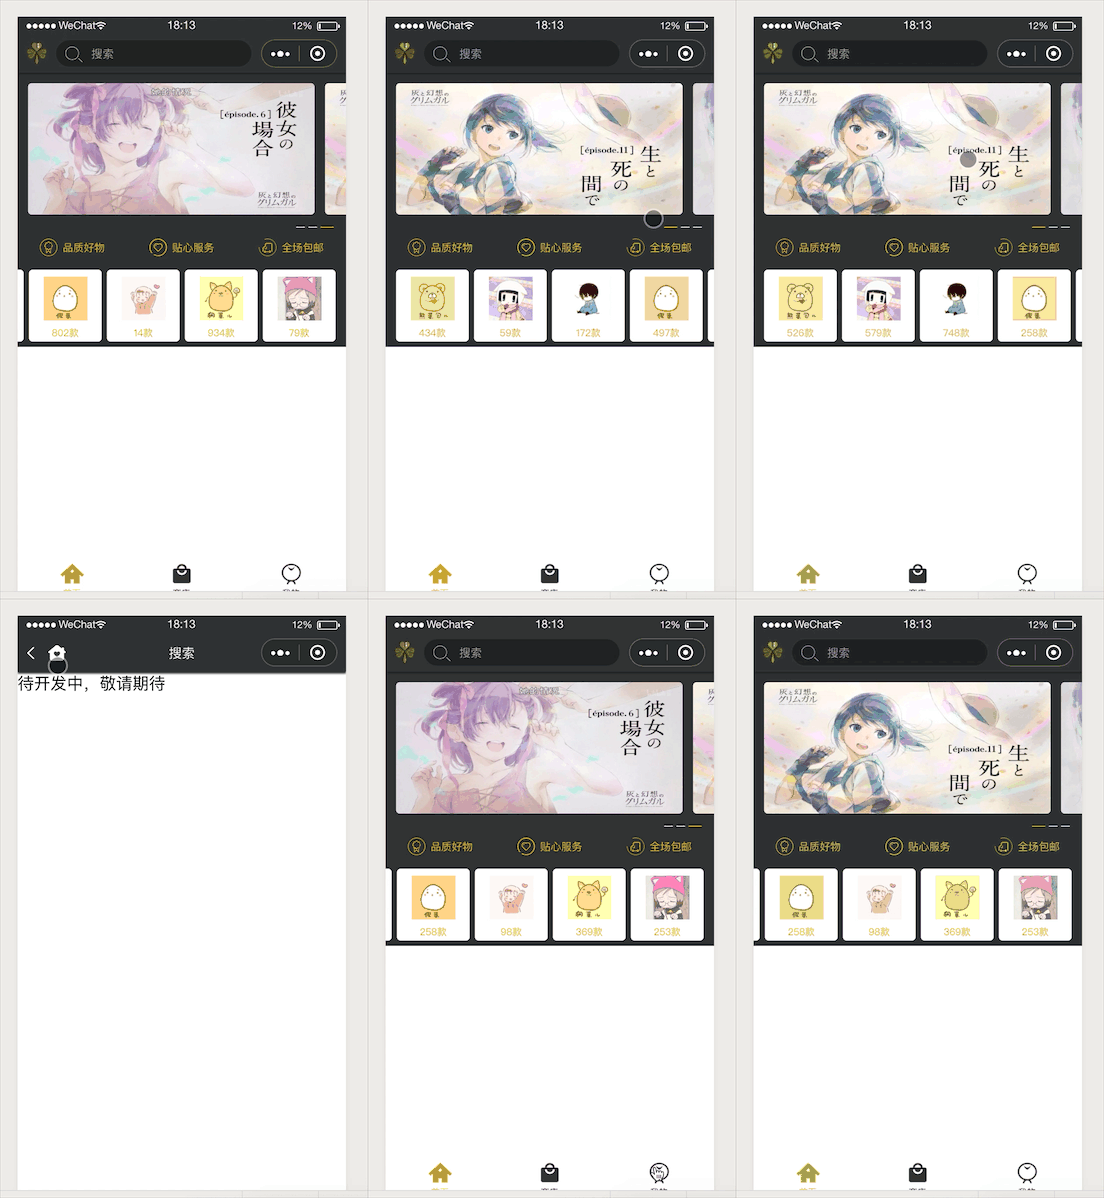
我们实现了一个与微信之前的导航栏行为基本一致,样式可自定义的导航栏,接下来让我们一步一步实现它,这里主要需要考虑如下几点
不同的手机,状态栏高度不同,需要进行相关适配
当开启小程序下拉刷新时,如何让顶部导航不会跟着下拉
自定义导航栏封装成独立组件,实现仅需引入到页面,无需对页面样式做相关适配工作
该项目托管于github,有兴趣的可以直接查看源码,weapp-clover,如何运行项目源码请查看ztaro
要想实现自定义导航,首先我们需要配置navigationStyle为custom(src/app.js)
config = { window: { navigationStyle: 'custom' } }
再实际情况中,我们往往需要对自定义导航进行各种各样的定制化,因此我们希望,封装一个最基本的导航栏,用于解决适配问题,其他样式的导航栏仅需对其进行二次封装,无需在关心适配问题,对于这个项目,我们封装组件如下: ComponentBaseNavigation 导航栏基本组件,用于解决适配问题 ComponentHomeNavigation 引入基本导航组件,定制化首页导航栏组件 ComponentCommonNavigation 引入基本导航组件,定制化其他页面导航组件
ComponentBaseNavigation实现
对于适配不通手机顶部的状态栏高度,我们需要利用微信wx.getSystemInfo获取状态栏的高度,因此在user model中新增如下代码(src/models/user.js)
// 省略其他无关代码
import Taro from '@tarojs/taro'
export default {
namespace: 'user',
mixins: ['common'],
state: {
systemInfo: {},
},
async setup({ put }) {
// 新增初始化获取用户手机系统相关信息,存储到redux全局状态中
Taro.getSystemInfo().then(systemInfo =>
put({ type: 'update', payload: { systemInfo } }),
)
}
}
实现组件逻辑(src/components/base/navigation/navigation.js)
import Taro, { Component } from '@tarojs/taro'
import { View } from '@tarojs/components'
import { connect } from '@tarojs/redux'
import './navigation.scss'
@connect(({ user }) => ({
// 链接redux中存储的状态栏高度到组件中
statusBarHeight: user.systemInfo.statusBarHeight,
}))
class ComponentBaseNavigation extends Component {
static defaultProps = {
color: 'white',
backgroundColor: '#2f3333',
}
render() {
const { statusBarHeight, backgroundColor, color } = this.props
const barStyle = {
paddingTop: `${statusBarHeight}px`,
backgroundColor,
color,
}
return (
<View className="navigation">
<View className="bar" style={barStyle}>
{this.props.children}
</View>
<View className="placeholder" style={barStyle} />
</View>
)
}
}
export default ComponentBaseNavigation
样式如下(src/components/base/navigation.scss)
// 大写的PX单位是为了告诉Taro,不要转换成单位rpx
// 通过测试和观察发现,微信顶部的胶囊宽高如下,并且各个屏幕下一致
// 因此采用PX单位
$capsule-padding: 6PX; // 胶囊的上下padding距离
$capsule-height: 32PX; // 胶囊的高度
$capsule-width: 88PX; // 胶囊的宽度
$navigation-height: $capsule-padding * 2 + $capsule-height;
$navigation-font-size: 15PX;
$navigation-icon-font-size: 25PX;
$navigation-box-shadow: 0 2PX 2PX #222;
.navigation {
position: relative;
background: transparent;
.bar {
position: fixed;
top: 0;
left: 0;
display: flex;
flex-direction: row;
justify-content: center;
align-items: center;
width: 100%;
height: $navigation-height;
z-index: 1;
font-size: $navigation-font-size;
}
.placeholder {
display: block;
height: $navigation-height;
background: transparent;
}
}
要解决我们先前提到的问题当开启小程序下拉刷新时,如何让顶部导航不会跟着下拉,仅仅只需设置.bar样式为position: fixed,这样当我们下拉刷新时导航栏就不会跟着动了,那为什么我们还需要.placeholder标签呢 如果你尝试着去掉它,并且运行查看效果时,你会发现,页面的内容会被顶部导航栏遮挡了,我们需要对每个页面进行额外的设置以使它如预期一样显示,比如给每个页面设置顶部padding,这样的消耗太大,因此我们专门设置placeholder标签占据与导航栏相同的高度,使页面不被遮挡,且无需额外处理
